Como Instalar um Interruptor Wi-Fi Sem Fio Neutro
, by DOMUTRA, 1 min reading time
, by DOMUTRA, 1 min reading time
Instalar um interruptor Wi-Fi é mais simples do que parece — mesmo sem fio neutro. Segue este guia e transforma qualquer interruptor convencional num dispositivo inteligente.
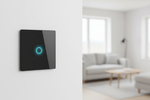
Nas instalações elétricas mais antigas (anteriores aos anos 90), é comum não existir fio neutro na caixa do interruptor. Os interruptores inteligentes tradicionais precisam deste fio para se alimentar. Os modelos mais recentes, como o Interruptor de Parede com Vidro, foram desenhados para funcionar sem ele — usando uma corrente de fuga mínima através da lâmpada.
1. Desliga o disjuntor — Vai ao quadro elétrico e desliga o disjuntor correspondente ao circuito. Nunca trabalhes com corrente ligada.
2. Remove o interruptor antigo — Desaparafusa a tampa e puxa o interruptor com cuidado. Identifica os fios: normalmente tens a fase (L) e o retorno (L1/L2). Não há neutro — é normal.
3. Liga os fios ao novo interruptor — Segue o esquema incluído no manual. Na maioria dos modelos sem neutro: fase entra em L, retorno sai em L1. Não há mais fios para ligar.
4. Encaixa na caixa de parede — Dobra os fios com cuidado, encaixa o interruptor e aperta os parafusos.
5. Liga o disjuntor e testa — O interruptor deve acender o LED indicador. Abre a app (Tuya ou Smart Life), adiciona o dispositivo e segue as instruções de configuração Wi-Fi.
Todos os interruptores Wi-Fi funcionam sem neutro?
Não. Verifica sempre as especificações antes de comprar. Os modelos indicados para “no neutral” ou “sem neutro” são os adequados.
Posso instalar em qualquer divisão?
Sim, desde que a instalação elétrica existente tenha pelo menos fase e retorno na caixa do interruptor.
Quanto tempo demora a instalação?
Entre 10 e 20 minutos para quem nunca fez. A configuração Wi-Fi pela app demora menos de 5 minutos.